itk-wasm UMD module from a HTML script tag
This example demonstrates how to use itk-wasm in a web browser application via its pre-built UMD module. This is an alternative to bundling the modules with the Webpack application, as shown in the Webpack example. In this example, we re-use the itk-wasm IO modules published on jsdelivr.com. Find the full example in the itk-wasm/examples/UMD directory of the GitHub repository.
Inside the HTML head, load the itk-wasm UMD script:
  <head>
    [...]
    <script src="https://cdn.jsdelivr.net/npm/itk-wasm@1.0.0-b.3/dist/umd/itk-wasm.min.js"></script>
  </head>
Inside body JavaScript code, the itk object provides itk-wasm API functions and objects as properties.
  [...]
  return itk.readFile(null, files[0]).then(function({ image, mesh, webWorker }) {
    webWorker.terminate();
These JavaScript itk-wasm components are used by the HTML, CSS, and JavaScript of the full example
Simple HTTP server
Optionally, add an npm script that will start a local web server for development.
npm install --save-dev http-server
Next, define a start command to start a local development web server in the scripts section of the package.json file,
  "scripts": {
    "start": "http-server ./dist/"
  },
To start the development web server hosting the ./dist/ directory contents, run
npm run start
Testing with Cypress
This section described how to configure browser-based testing with the Cypress
First, install Cypress and the start-server-and-test package.
npm install --save-dev cypress start-server-and-test
The start-server-and-test tool can start our development server for testing with Cypress.
Create directories to house our tests and test data:
mkdir -p cypress/integration cypress/fixtures
Provide a test dataset:
cp /path/to/cow.vtk cypress/fixtures/cow.vtk
Create our test script at cypress/integration/load_data_spec.js. The test files names should end in *_spec.js.
describe('Load data', () => {
  it('successfully loads a mesh', () => {
    cy.visit('http://localhost:8080/')
    cy.fixture('cow.vtk', null).then((cowBuffer) => {
      cy.get('input[type=file]').selectFile({ contents: cowBuffer, fileName: 'cow.vtk' })
      cy.get('textarea').contains('"numberOfPoints": 2903,')
    })
  })
})
Then, specify npm scripts to develop and debug the tests and run them in an automated way.
  "scripts": {
    "start": "http-server ./dist/"
    "cypress:open": "pnpm exec cypress open",
    "cypress:run": "pnpm exec cypress run",
    "test:debug": "start-server-and-test start http://localhost:8080 cypress:open",
    "test": "start-server-and-test start http://localhost:8080 cypress:run"
  },
To develop or debug tests, run
npm run test:debug
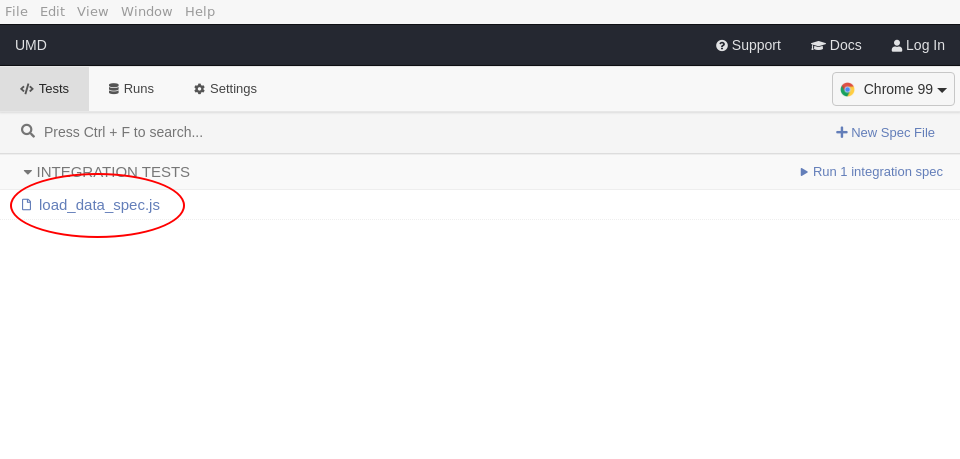
This will open Cypress. Select the test to run:
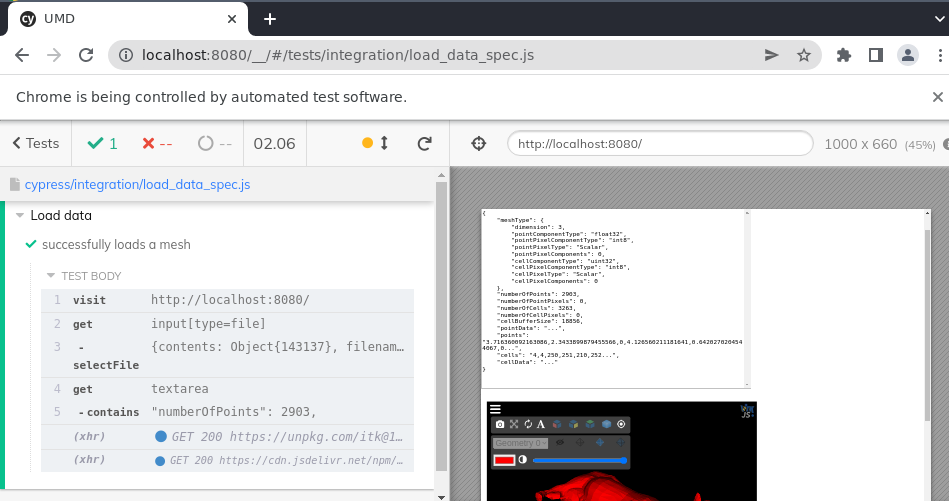
This will load the selected browser to see the test status and web page that is tested. You can also open the browser’s development console.
To run the tests during continuous integration:
npm run test
This will output the tests results in the console:
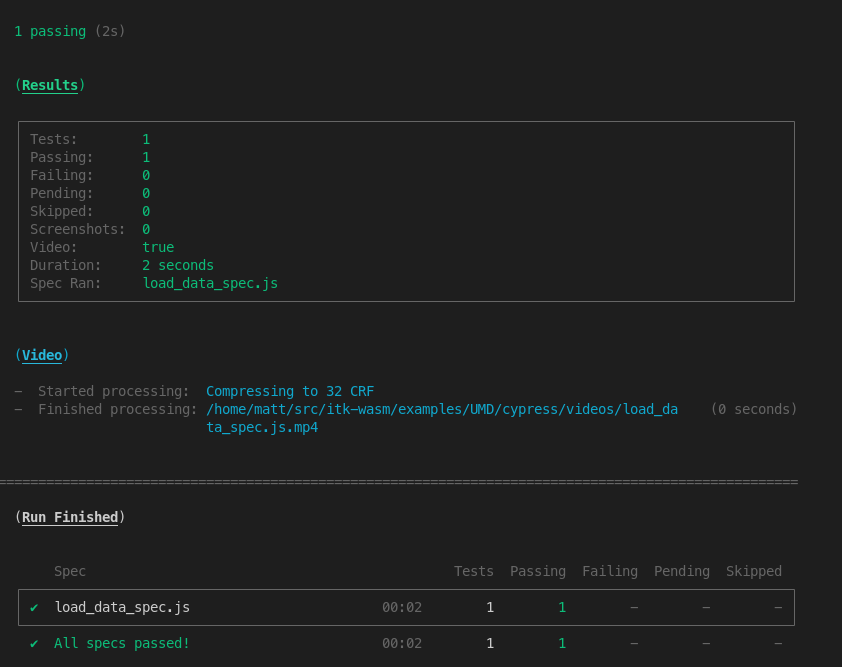
And produce a video of the result at cypress/videos/.
